Configuring wait time and queue position
When a customer tries to contact an agent through live chat to answer their questions immediately, there is always a chance that they will encounter a queue. If they do, the business must let the customer know how long they need to wait in the queue before they can talk to the live agent, for better customer experience.
Video
Transcript
This demonstration shows you how to configure the initial and updated wait time and queue position of a customer in a queue.
Consider a scenario in which U+ Bank wants to let its customers know their wait time and queue position before starting a chat interaction with an agent. Sending the initial and updated wait time and queue position in real-time will ensure the customers are satisfied and happy to wait for their interaction.
To implement the business scenario, log in to App Studio and then click Settings > Chat and messaging.
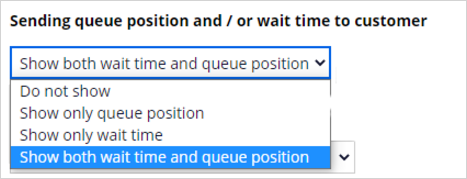
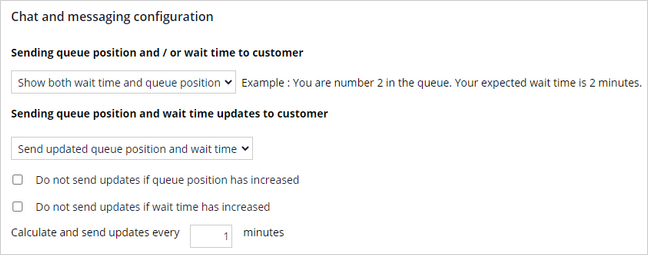
In the Chat and messaging configuration list, In the Sending queue position and / or wait time to customer list, select Show both wait time and queue position to send the details right after an escalation.
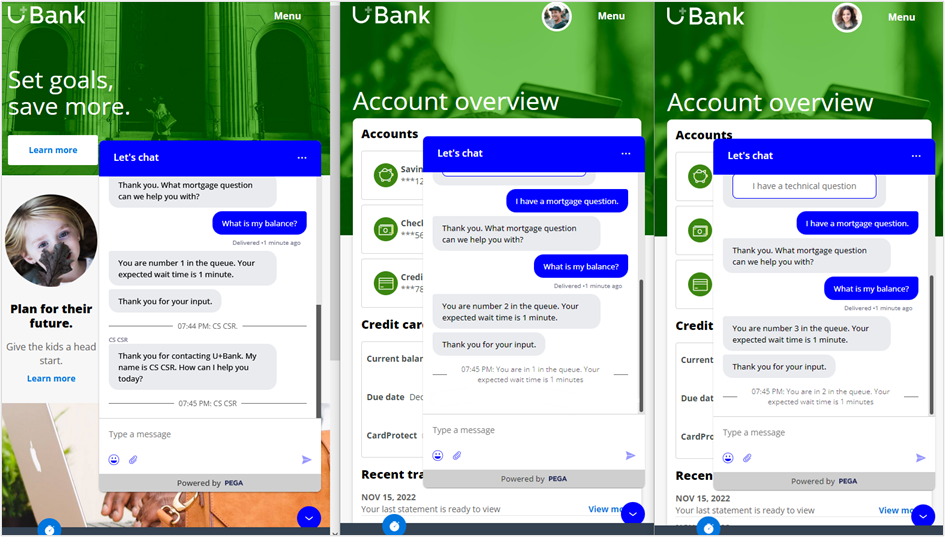
It will show you what the initial message looks like in the chat interaction right after escalation. Example: "You are number 2 in the queue. Your expected wait time is 2 minutes."
In the Sending queue position and wait time updates to customer list, select Send updated queue position and wait time for the system to send an updated queue position and wait time.
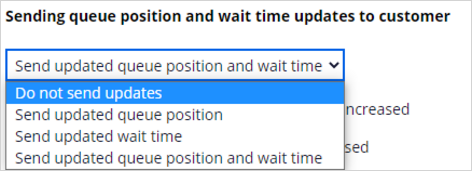
Select the Do not send updates if queue position has increased checkbox to prevent the system from sending updates to customers if the queue position has increased. Similarly, select the Do not send updates if wait time has increased checkbox to prevent the system from sending updates to customer if the wait time has increased.
To calculate and send updates to the customer in a specified time interval, enter a value in minutes. For example, if you enter 1, then every one minute the system sends the updates to the customer.
When you select any option except Do not send updates, the system displays the Enter interval to send updates.
Save the changes, and then log off from App studio.
Now, log in to the Interaction Portal as a Customer Service Representative and then in the header, click the Chat icon to make the agent available for the Mortgage queue.
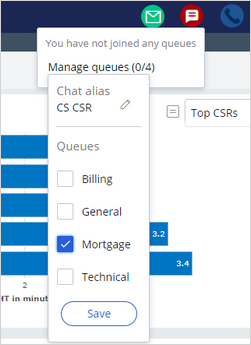
On the U+ Bank website, escalate a couple of chat interactions for the Mortgage queue to observe how the initial message about the queue position and wait time is displayed.
The first customer service request has been routed to the queue. Accept the incoming call, and then wrap up the conversation.
Notice that the queue position decreases by 1 and the system sends an updated queue position and wait time. It takes one minute to send the updates, because we configured an interval of one minute.
You have reached the end of this demo. What did it show you?
- How to configure the initial and updated wait time and queue position of a customer in a queue.
This Topic is available in the following Module:
If you are having problems with your training, please review the Pega Academy Support FAQs.
Want to help us improve this content?