Configuring customer search and customer 360 options
Learn how to add a new control and edit an existing one in the UI of the customer 360 view. The composite of customer data (sometimes called the customer 360 degree view) is highly customizable to best meet the needs of your CSRs. For example, an application administrator can update sections of the UI to add fields and controls, as well as adjust their presentation options.
Adding a control to the UI
Nota: The configuration is the same whether you add a control or a field to the composite.
- In the Interaction Portal, click New > Demo Screen Pops > Demo Pop -Connor, and then click Accept to start an interaction.
- In the header of App Studio, click Design.
- Determine the section where you want to add the control, and then click Edit this section.
- In the configuration pane on the right, in Column A, click the Add icon to add a control.
- In the Add list, in the Date time section, click the Add icon to add the control to the section.
- Close the list.
- In column A, to the right of the Date Time control, click Edit.
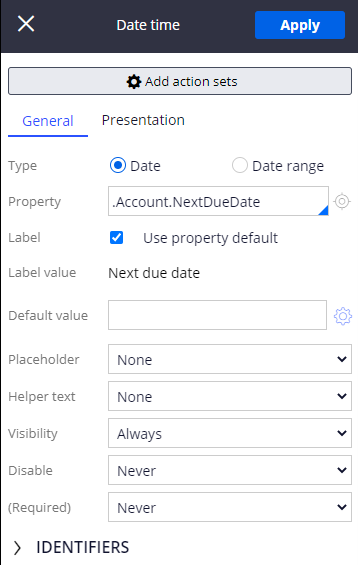
- In the configuration panel, in the Property field, enter or select .Account.NextDueDate.
- Click Apply.
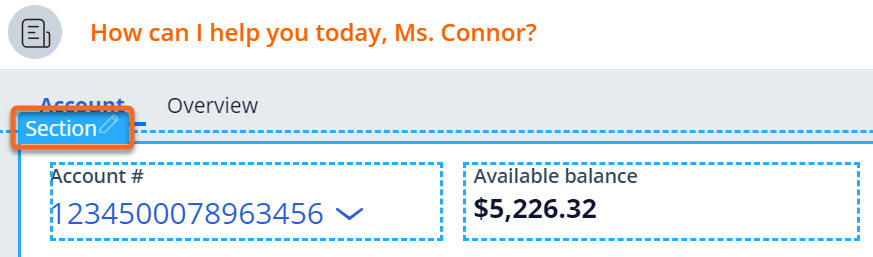
The customer composite now displays the Next due date control. The following figure shows the completed configuration of the Date time control:
Changing the options of an existing field
It can be valuable for fields and control to have certain properties to ensure that the composite works as intended. For example, the business might require that CSRs cannot edit the Next due date field. Alternatively, the business might require an account number to have a maximum of eight digits for customer searches.
Setting a field as read-only
Nota: The following steps assume the configuration continues from the last step that you performed in the Adding a control to the UI section.
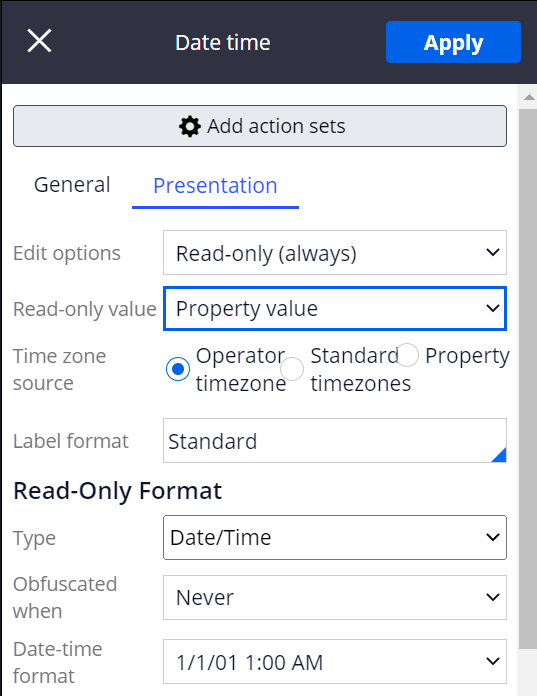
- In the configuration pane, click Presentation.
- In the Edit options list, select Read-only (always).
- Click Apply.
The following figure shows the completed read-only configuration for the Next due date control:
Configuring the customer search
Nota: Changing the options for customer search requires you to begin a new interaction with an unknown caller.
- In the Interaction Portal, click New > Demo Screen Pops > Demo Pop – Unknown (Service), and then click Accept to start an interaction.
- At the top of your screen, click Design.
- Locate the section containing the account number, and then click Edit this section.
- In column A, to the right side of Account number, click Edit.
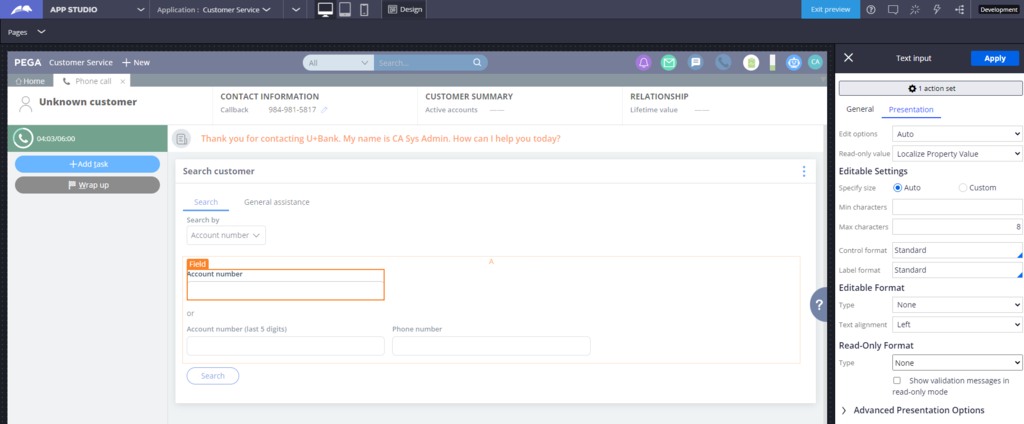
- Click Presentation.
- In the Max characters field, enter 8.
- Click Apply.
The Account number field now allow only a maximum of eight characters for entry:
This Topic is available in the following Module:
If you are having problems with your training, please review the Pega Academy Support FAQs.
¿Quiere ayudarnos a mejorar este contenido?