Using a design template
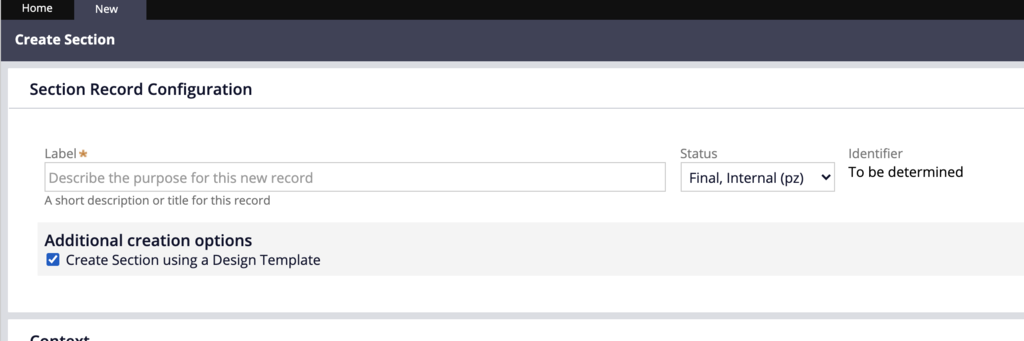
In Pega 8.3 and higher, creating a new section automatically applies the 1 column template layout. For older versions, you must select the Create Section using a Design Template check box under the additional configuration in the new rule creation form.
If you have an old section, it is possible to convert it to use design templates.
If you are using Pega 8.4, a banner in the section rule header indicates that this section is not using a design template and provides an action to upgrade to a design template.

The conversion is not 100% representative of the original section. All elements included inside the different dynamic layouts are moved to a 1 column design template. You must then select the correct design template and move the different elements into the right region. While the process of upgrading still requires manual work, this action avoids the need to copy and paste every element in the section.
Hinweis: Since the conversion moves all the fields into a single 1 column design template, settings like when condition or refresh condition applied to inner dynamic layouts will be lost. For these cases, you likely want to convert these inner dynamic layouts to a section include before the conversion or move these settings into individual fields.
If you are using Pega 8.3, you need to create a new section based on a design template inside a branch. Make sure that the section name, class name, and ruleset match the section to convert. Once you have the old section and the new section in two different tabs of Dev Studio, you can copy every element in the old section and paste it into the new section.
The Copy action in the full section editor is available by right-clicking an element.
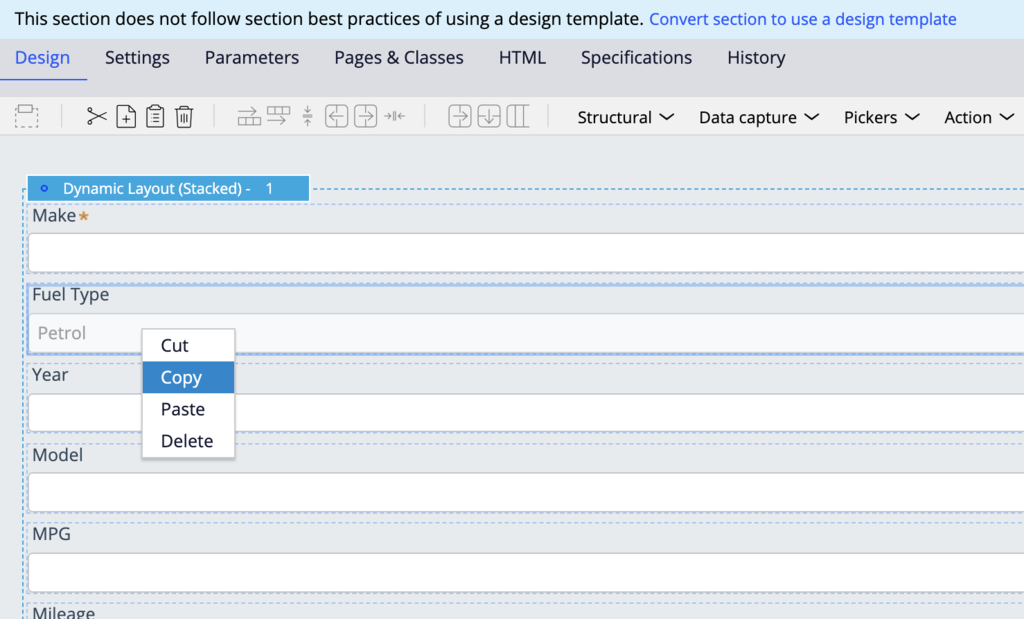
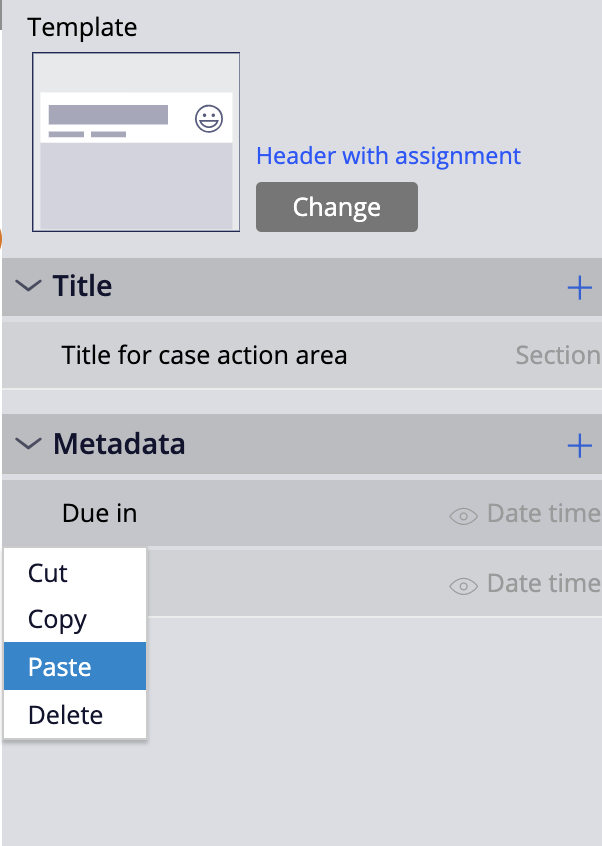
The Paste action is available when right-clicking on any field inside a region.
Editing a section in App Studio
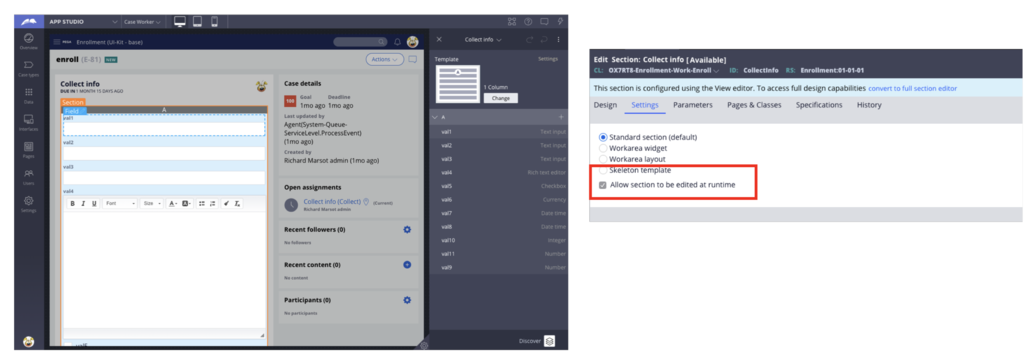
One of the benefits of using a design template in a section is that this section can now be edited in App Studio. Old section rules (also called full sections) are not editable in App Studio.
To enable this section for editing, select the Allow section to be edited at runtime check box in the Settings tab. When you click the Design button in the App Studio header, you see a blue highlight around the section and the ability to customize the section.
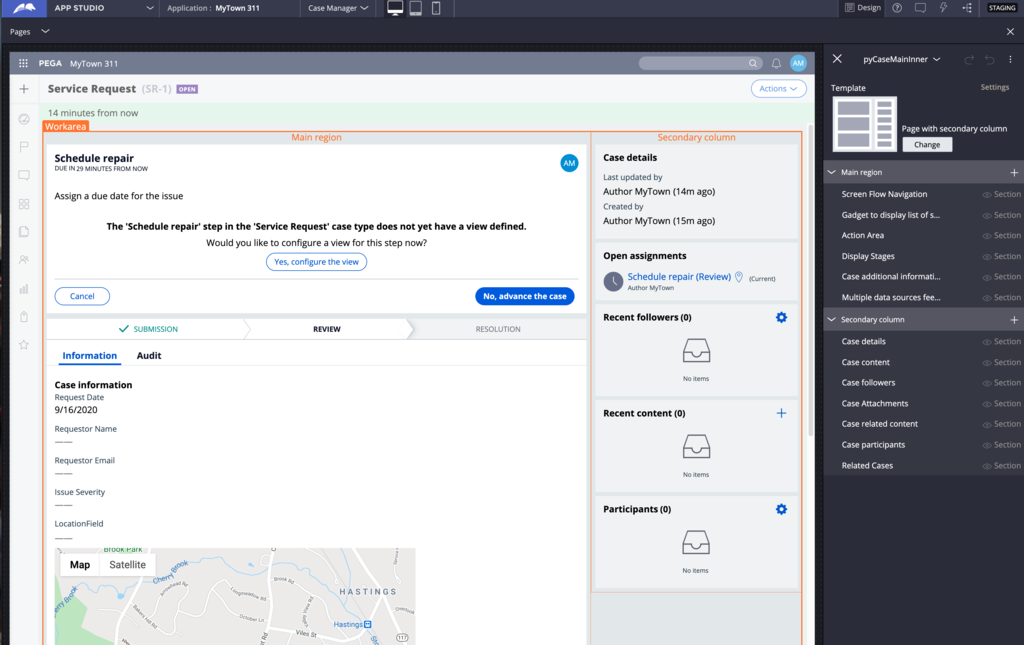
Exposing a section as workarea layout
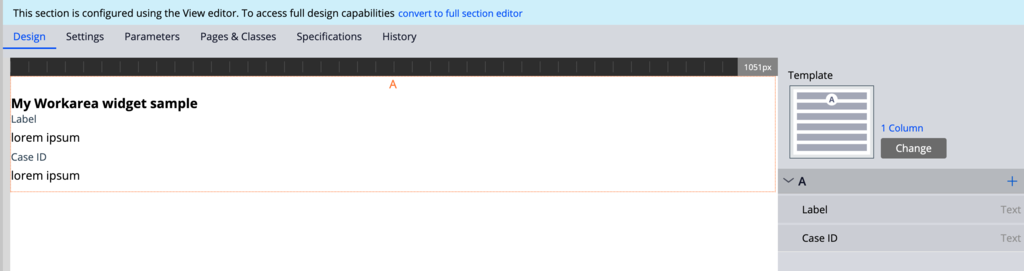
Some of the sections using design templates are used for page layout. This is the case for the pyCaseMainInner section in UI-Kit and Cosmos-Theme. This section is the main work area section and is used to place the different widgets on the page. For this page, you want to only allow the ability to add sections to the different regions and want to remove the ability to drop simpler components like buttons or text.
For example, when using UI-Kit, the pyCaseMainInner section is set by default to use the design template called Page with secondary column.
To mark a section as a Workarea layout, open the section in Dev Studio. Then, in the Settings tab, select the Workarea layout radio button.
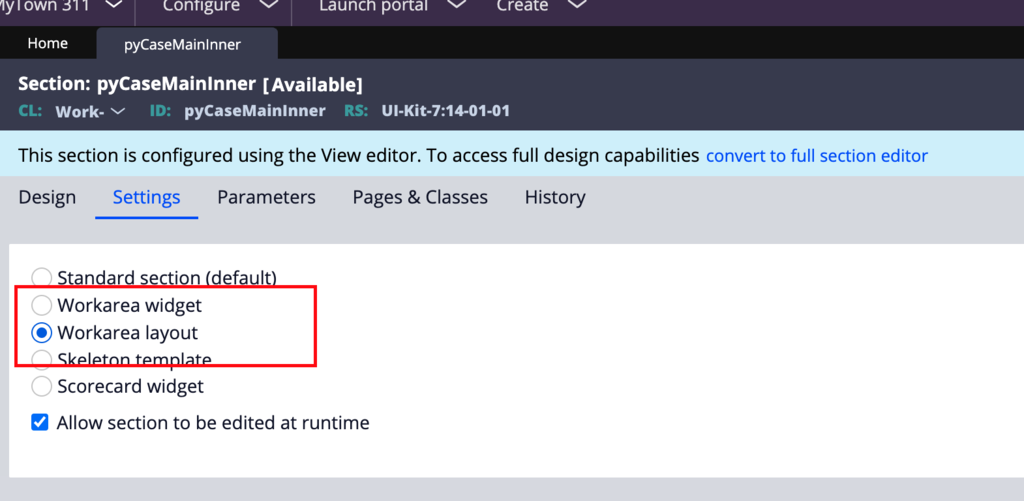
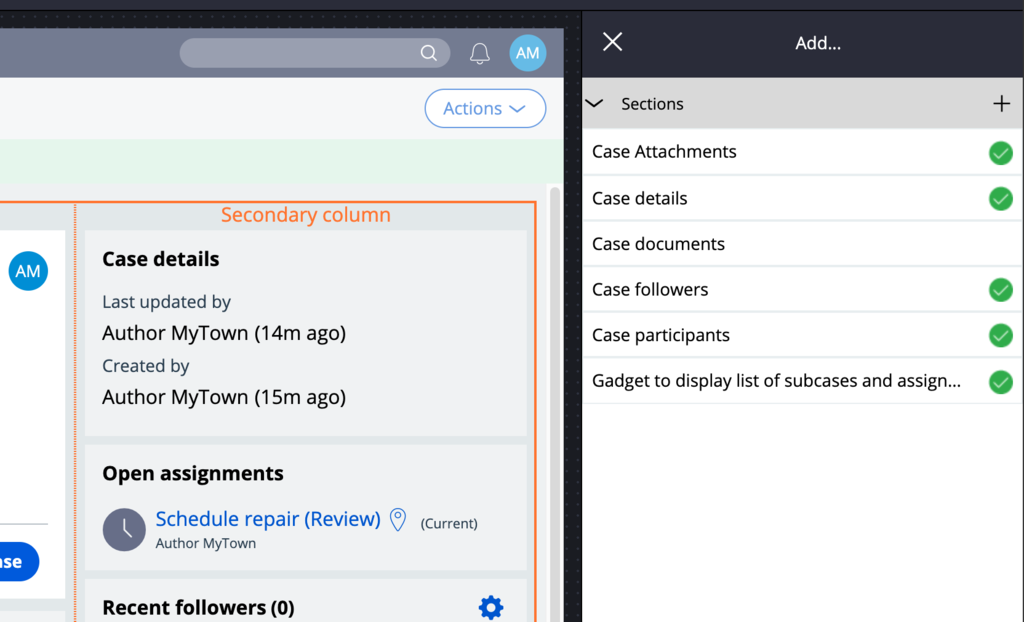
If a section is marked as a Workarea layout, when clicking the Add icon in the region, App Studio runtime editing allows you to only add sections to the page. Only the sections that are marked as work area widgets are presented in the filtered area.
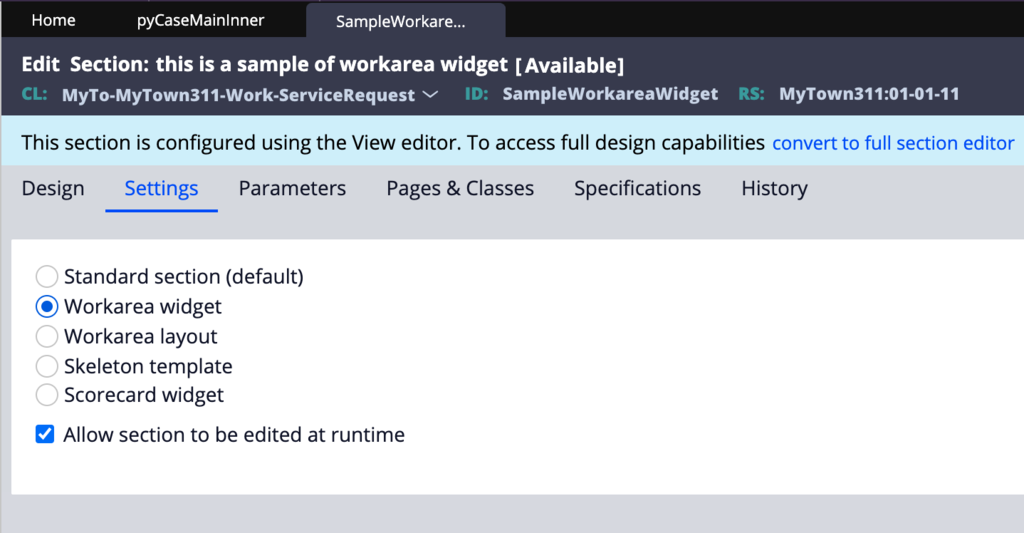
Exposing a section as workarea widget
To mark a section as a work area widget:
- Create a section based on a design template and set it to Workarea widget in the Settings tab. Make sure to set the correct Apply to class for this widget. If the widget is used in a case, then set the Apply to class to Work-.
- Enter a meaningful short description in the ruleform of this section.
- Add components to the widget. You may potentially include a header.
- Save the rule.
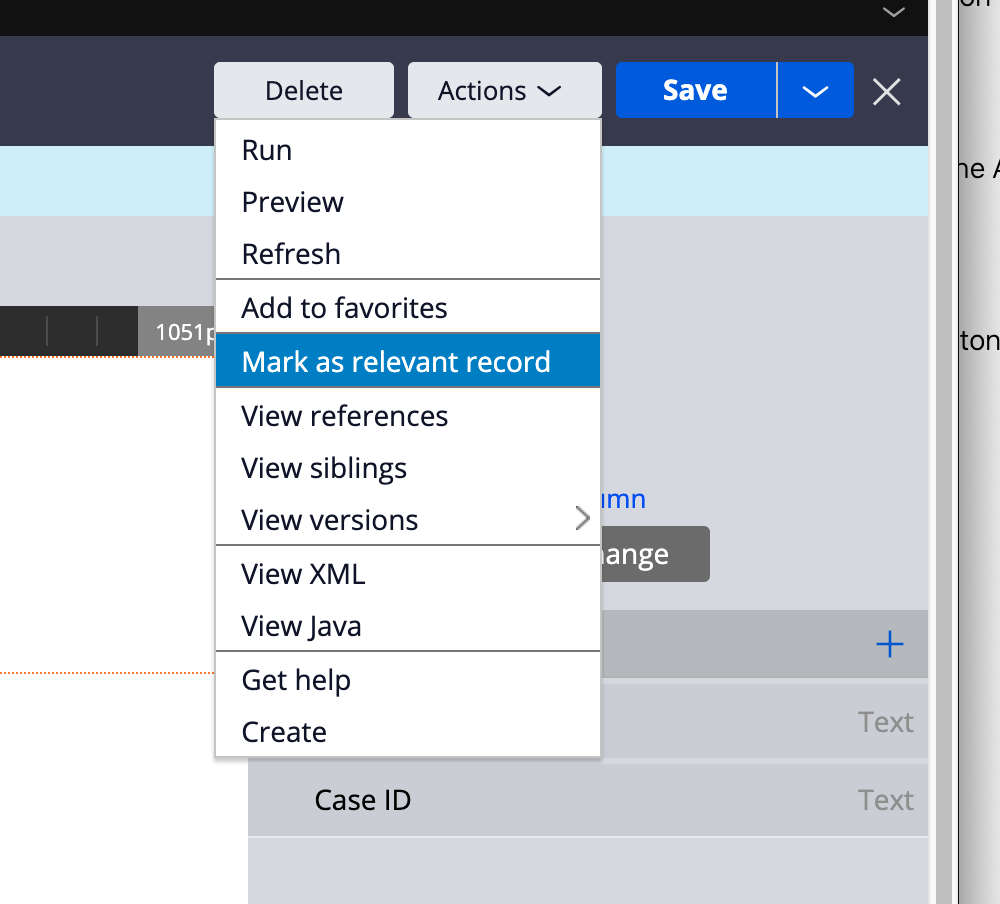
- In the menu, make the rule a relevant record and save the rule again. This is a required step to add the section to the filtered list in App Studio.
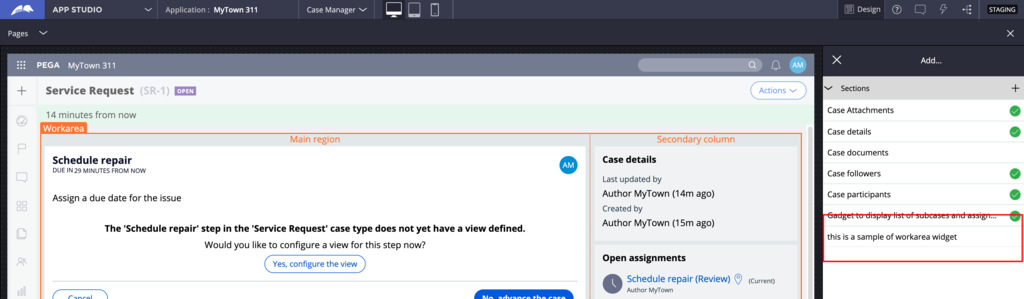
- Switch back to App Studio, and click the Add icon in a work area layout section to see your new widget in the list.
Check your knowledge with the following interaction.
Dieses Thema ist im folgenden Modul verfügbar:
If you are having problems with your training, please review the Pega Academy Support FAQs.
Möchten Sie uns dabei helfen, diesen Inhalt zu verbessern?